|
|
|
TIPATHON (Cont'd)
| Business Tips | Software-Obtaining | Software-Learning | ||
| Writing | Background | Recording | ||
| Modelling | Surfacing | Miscellaneous | ||
| Metaphysics | Animation | Employment | ||
| Education | ||||
This page is awaiting a major overhaul, but much of the less technical info is useful.

I know nothing about modelling, but I can share what I've heard.
In the "real world," from what I hear, the modeller creates the proto-model, and then this is sent to texturing, where it is UV-mapped. If the UV map has a problem with certain edges, etc., these are corrected. For all its convenience when a model is being morphed, UV mapping is pretty tiresome, and is not used where it isn't needed. When the model is finished with a rough texture, at least, it is given the "okay" for morphing. The modeller continues pulling points to create grimacing, scowling and syllable "face-shapes," confident that the texture will follow along. This is how it works at "factories" like Disney, and this method can be adapted to LIGHTWAVE. If I were an employer just starting out, I might want to hire a group of animation generalists and see what each was best at, and then let those with nascent/absent skills sets pick up the work the highly skilled didn't feel like doing, like creating seamless textures, etc.
Sometimes a factory designer will have drawings to work from -- for a cartoony feel, for instance -- then every pose gets "approved" before being animated.
An encyclopedia will pay for itself a hundred times providing reference art in a pinch.
Factory modellers say they create little turntable loop scenes for final approval of their models, with gray as the color. A modeller's demo reel might be just gray turntable objects, one after another. At least, the MAYA animator demo reels look this way. LIGHTWAVE character demo reels generally have a textured character doing lip synch with emotional gesticulating.
Some modellers actually work in clay at some point it apears. A comparable way to "rough-in" one's model when the "look" hasn't yet been established is to render the object as it is. This image is then loaded into a paint program and "played with." Kursad Karatis recommends this method, and it's also a heap of fun. One can grab hair from another image, rotate it, erase around it, and cut and paste some of it. "Photo Deluxe" has been included as freeware with printers and scanners, but there are also low-priced paint boxes off-the-shelf for about $20.
Props, trees, furniture, etc. may have been designed on paper by professional designers in the real world, before being passed along to the modeller.
A number of conventions seem to apply to the aesthetics of realistic modelling and design, such as color balance, repetition of common shapes, and textures that add a tactile or other quality. In figure drawing, artists learn that the more interesting nude has knee shapes repeated in breasts, elbows, rib cage, chin, hair, hand and heel. These artsy tricks are easily cataloged from a variety of sources. Where is the detail in a shot, where the audience is looking or off in the corners of the frame?
The occasional smooth rounded shape among a group of random or wrinkly shapes calls attention to itself. Contrast is also used to make a large dark spaceship appear dark by having a small porthole brightly lit, with a background star somewhere in the frame. This is a cinematography technique. It is used A LOT. Have a tiny character climb an elephant; go from a character wearing a wet rag in a breeze to one in a fur coat; go from trying to see through moving trees to a closeup; follow fear with love, yellow with blue, a long silence with a marching band... IMPACT can be overdone, but it is sometimes one of those "ineffables" that is attributed to the Technicolor corporation, when it is really practical drama and design. I am fond of all kinds of wrinkles because they render fast, and break up the monotony. The computer look is often characterized as smooth and tubelike or boxy; a batch of holes and wrinkles can do wonders.
Another cinematography technique: if you can't fix it, put it in shadows, tilt it away, shoot around it. I was startled to learn how often shadow is used in cinematography. "Targetting" a light on a null and parenting the light and null can keep the look consistent. Other elements like "virtual" barn doors using transparent surface maps and flags and spotlights can keep a problem object from being hit by stray lights. Hollywood likes extra lighting, so images that look heavily lit tend to look acceptable. The quickest fix is to not turn on ray-tracing, but to switch to shadow maps. An "area" light composed of 100 point lights or a single "spinning" light can soften problematic contours, but at a loss of countouring. "Shadow mapping" will create many more artifacts than solutions (light on the inside of a mouth coming from the back of the head, etc.) but it has been known to save a sequence, and it renders very quickly.
See "surfacing" above for tips on texturing with INSPIRE. I have been told "Shrek" used bones for facial features as well as limbs and hair, which doesn't require UV mapping.
By the way, make cheerful characters if you can. Psychotherapists would say the characters you make reflect aspects of your own personality. Besides, they cheer you up and you can share them with folks more.
Model "treeform" animal/figure limbs slightly bent, according to Ernie Wright, and eyelids closed, according to Larry Scuhltz, and mouths partially open, according to Tim Granberg.
Another common practice is for minimal "proxies" to be used throughout animation, despite one's being able to convert half the objects to wireframe using the "Scene Editor" texture column. There are about a dozen reasons to do this, but important to INSPIRE is that when one has a ship loaded full of animals, all rigged with bones, the interface starts to slow down. I am not sure if this is due to a hardware problem like not enough RAM, or something else. The first line of defense is to use the "Scene Editor" to convert many of the objects to untextured surfaces, but aesthetically, this is probably the first thing NOT to do, isn't it? Low budget filmmakers used to use black&white copies of their color movies to cut and mix sound to, but the better studios avoided this. Color should sound different, according to one Oscar winning mixer. Fortunately, making low-polygon models for this purpose is as easy as pressing a few buttons like "Reduce Polygons" in Modeller.
Polygonal modelling is a little tricky when trying to apply to smooth organic shapes because every point matters. Thus, one needs to model groups of points, rather than single points, but then, this means more care with adjustments. NURBs modelling is preferred, probably because the curves use four points at a time for each curve. In a nutshell, that's why NURBs are often used for organic shapes. If you tug on a point of a <tab> metanurb shape in INSPIRE, you will notice its affect on distant parts of the shape, everything is kept together smoothly.
According to modeller/rigger/instructor Larry Schultz, the differene between the inexperienced modeller and the experienced one is the difference between modelling to get the rough shape, and modelling so that the labio-nasal fold is an edge of polygons, the "flow" that results in highly efficient and animateable models. These typically low-polygon-count models are pretty easy to recgonize -- a few are in the INSPIRE inventory. Starting from this point, the experience modellers may add veins and tendons, if they didn't include them already. FLOW also describes when the polygons of an object do not zig-zag abruptly or pinch, unless this is desired. Criss-crossing lines with lots of zig-zagging may look fine in one position and ghastly if tugged a bit, such as when making face-shapes (morph targets).
LIGHTWAVE modellers need to learn to do this "flow" design by eye, though the "Smooth" button can be effective with high "iteration" values; strong modelling packages like "MAYA" will actually have a button that does some of this, called "Rebuild." It can't hurt to start with flow in mind.
At one time, I thought that the trick with subdividing and "knifing" was to go through the whole object. but again, this is SHAPE modelling, and may result in a lot of extra points where they aren't needed. Watching a modeller like Larry Schultz work with the tool, he performs smooth shifts with the occasional knife operation only on the few polygons where it is needed. Larry Schultz also works as an instructor at www.foundationinstitute.com . He also doesn't mind making the occasional "weld" or smooth-shiftting a row of polygons but only moving the top half of their points. This will create tiny polygons in a line for lips and creases. Larry's personal website is www.splinegod.com .
Can a person get a NURBSlike effect with conventional "smooth subdivision?" (Smooth-subdivision is not the same as "subdivision surfacing" also called "sub-d," smooth subdivision refers to smoothing equations which compare the number values of vertices in the Cartesian coordinate (xyz) system and average them...) Yes and no. If you work in great detail point-dragging with only a dozen points, and then smooth subdivide and/or "Tool" panel "Smooth" further (with 5-30 iterations), you can get an organic heart shape, for instance, but every point matters, so curves are easily made jagged, and flat planes will tend to stay flat. The subdivided smooth and (tool) smoothed object will be puffier with larger flat areas than the NURB which is a more thorough averaging of points, so that moving one point could adjust six others and each of those six would adjust four others, in turn. Depending on the object, very similar effects may be achieved.
Polygonal modelling is automatically (Meta)NURB modelling in INSPIRE, just by pressing <tab>. (I am told "true" NURBS systems are different, but I am not an engineer. Those who say they prefer other NURBS systems usually like one or two tools in particular.) But there are many instances where one wants jagged models. Okay, not many, but some, really. When one looks around, one notices little bevels and smoothed-over edges everywhere. This was also pointed-out on a www.menithings.com web page. Nowadays, I start with primitives that have many subdivisions to start with (using the arrow keys when making a box) because I know I will be sizing the corners smaller to round them, as well as the edges.
INSPIRE has an arsenal of modelling tools, but some of them are not very obvious: if you use BGConform with points copied to a background level, it makes possible "group welding" useful for mirroring; if you put a negative number into the "Smooth" tool, it increases jaggedness; INSPIRE's "grid-snap" is even more powerful with "j" but it is best to keep the window to the same size; "Save Transformed" in the Layout module will save displacement mapping and bones distortions as a new object; and "mot" files created by moving a null around a picture or architectural drawing can be input as single polygons for reference or modelling.
According to authorities I've met, all the leading CGI softwares convert shapes to polygons during rendering. NURB modelling is always converted to polygons; it is an intermediary tool, like Metaballs or other plug-in's. Those of us who have studied "true" NURB modellers like Rhino and MAYA can say that the constraints on welding are annoying and time-consuming, but the results are very nice.
So, once more for emphasis, everything is ultimately a polygon; the NURB method is just a way to get there, like a Metamation plug-in. The smooth and round polygon results can be reached by many means. NURBs get extra "business" because they provide a low-point proxy for point dragging into morph poses, whether a LIGHTWAVE MetaNurb or a MAYA object. Since control points will tend to occur in positions of natural creasing by design, these methods will likely stay popular. LIGHTWAVE is increasingly allowing for FLOW modelling with techniques like "spin-quads," from what I am told, but if one works in point mode, one can probably get the same results with trial-and-error. As with Windows, there are a dozen ways to do the same thing, but some are faster.
The closest comparable alternative to NRUBs might be a high-polygon model "optimized" using a "Reduce Polygon" plug-in, as long as the plug-in included a command for pre-setting where some of the new polygons's vertices would "land," though another way to do this might be to deselect those vertices before "optimizing" the object. As mentioned, the polygonal approach to modelling smoothly is easier to resort to a plug-in, or build the model for later subdivision, or work with groups of polygons using the tools like "vortex," "magnet," "pole2" etc.
When I first wrote this section, I had very little idea how modelling was done. I had heard NURBs were used, and that tools like "bevel" and "smooth shift" were used. An instructor or a good instructional video can do a world of good; the evolving "101" page is what I would have liked to have been able to go to at one time.
From the Glossary: "For us newbies, here is an alternative: make a sphere, and using "Subdivide smooth," add so many polygons that it is beginning to slow down the refresh of the display. "Undo" the last subdivision. Now, get your favorite character or any good profile from the TV Guide, and paste it to the monitor as "Reference art." (Not a lot of profiles out there, are there?) Use primarily "Magnet" to push and pull points, and the"Alt" "," and "." keys to adjust the screen position. When you're done, select the areas where you did very little detail work and go to the Tools Custome List's "Reduce Polygon" button, and reduce polygons with a tolerance of "1" or so, play with it. If a few disappear, try "triple." Voila! Sloppy, but sort of nice. Give it a color and move on.
Those $60 video's that you hear about? They're probably worth it, though I haven't seen any. Did you know that INSPIRE has a "Group-weld" plug-in that allows you to weld one group of points to another group of nearby points? "BGConform" will do this if you first copy one of the two groups to a background layer, then "BGConform," then merge. Another source of this kind of knowledge is the archive of past newsgroup mail at the yahoogroup LW3D at www.yahoogroups.com . I recently had a friend at www.friedman3d.com look over my shoulder and then show me step-by-step how he made a head. Seeing someone start with a mouth cube, plodding around, copying points, moving them, and then point-by-point making a polygon (press "p") gradually spreading a face surface, and then stretching the new polygons and "knifing" them (emulated using a Boolean card "Add") -- it can take an hour or more to make a human head. WOW! That's the trick? Plodding?! (To be fair, the first thing he did would never have occured to me ,... the part of the face I kept having trouble with ... the LIPS. He began by making a cube into the lips projecting far out like Halloween wax lips, and then extending the back of the cube up, in order to make the face around the lips.) At the last lecture of a NURBS modelling the class, the instructor said "You have to know this to geta job" and made sure we knew how to weld an eye-shape to a sphere primitive head. The eye-shape was a drawn eye curve that was stenciled/subtracted on a sphere. The instructor was careful that the object was composed of 16 points. For MetaNurbs, each of these points is welded to a corresponding point of a subdivided sphere object. You might point-drag them to the same positions instead, but welding comes in handy often enough; the next step is to "smooth-shift" this eye shape a few times carefully to obtain a brow, lid and eye socket.
If you do not know how to "weld," you do not know smooth modelling. There's a nice gross generalization! But when I was modelling for a friend's Bible show, grabbing free objects from everywhere I could find them, I had to make a moose from a horse and I noticed that there were very noticeable seams. NOT welded. LIGHTWAVE has an equation/logarithm built into its renderer that dramatizes/seams where an edge occurs that is not created by the nearest points, and the easiest way around this is to WELD the edge's points, thus allowing them into the roster of points. In any case, I then added a moose's head and eliminated the horse's head, and had to do some more welding. This is not the way to get a model with great FLOW, so additional welding followed, but the result got a nappy texture and was passable.
Computer Aided Drafting CAD inputting machinery goes by a number of names: polhemus, reverse modelling, scanning, object capture, avatar. A common design is a pen on a funny armature; and the principle is that the hinges that position the pen are also knobs that send a voltage reading just like a volume control. The armature can be any size using this principle, all the work is done by knobs feeding values into a short program that enters the pen's position when an operator presses a button.
Here is an interesting trick (I had to put it somewhere...): how to do cross-sectional modelling with INSPIRE. Get together some cross-sectional drawings: wrap an object in wire, cut it up on a bandsaw, dip it in ink, project a knife-edge slit on it, put pin-striping tape on it, cast a shadow on it using a clear light bulb and coat hanger, whatever. Create a series of profile images, black and white, and scan them into the computer. You may want to divide them into somewhat equal sections, like 64 equal segments, but putting more segments where there are intricate details. Load an image into the modeller as a texture on a card. We're halfway there. Now add a Null object, and animate the Null to go around the cross-sectional profile, one keyframe for every segment. Now, go to the Graph Editor, and press the "Save Motion" button for that key. Now, go to the modeller, and create a single point by creating a box and deleting seven points, using the pen key, what have you. Now in the Multiply menu, press "Path Clone." It will request a motion file, so give it the name of the motion file you just created. Ta-dah! Connect the dots clockwise and press "p" or the "MakePol" button in Tools. (There are LIGHTWAVE functions and plug-in's that automate this much faster, but expert modellers will tell you this is no way to get FLOW.) You can enter the remaining cross-sections this way and then join them point-by-point four points at a time, but this is also a very useful technique for creating a profile polygon that can be used as reference art in the Modeller. (I should mention that current LIGHTWAVE versions have texturing in the Modeller, making using reference art much easier.)
Although there are two reasons NOT to capture real objects -- patent infringement and a lack of aesthetic homogeneity -- one can always go into a finished model and monkey with it a smidgin to make it less recognizeable and more characteristic of other objects or an overall theme. I do not know who rents object-scanning machines, but someone MUST be renting them.
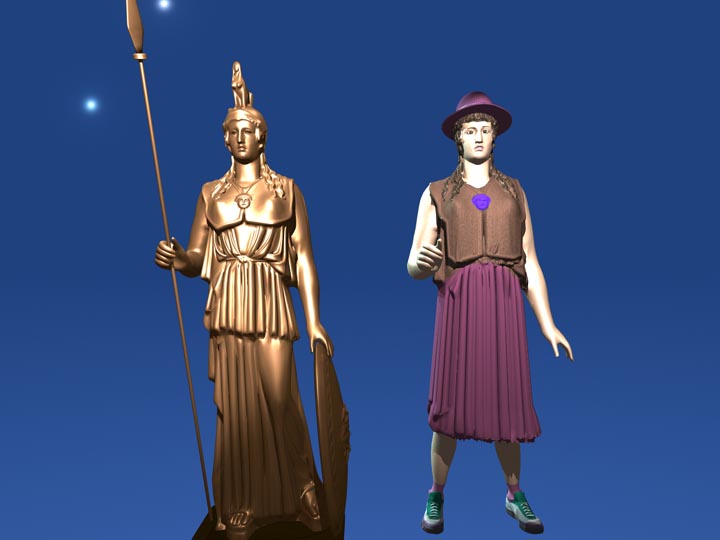
I have to wonder if they are not being used by some of the model inventory services; the leader apparently being www.turbosquid.com which has links to several other model inventory websites like www.3dshort.com and www.3dlinks.com . Athena on the left, below, is one of 3D Short's models, and it points out many of the benefits and problems with using inventory objects. The Di Espona license is not quite as rigorous as other object geometry licenses; some forbid selling the geometry to a third party, bethey CD publisher or movie producer, whether or not it's been "tweaked." The statue is a "free" model, and it is my pleasure to list their website here. Models like these will not get you work as a modeller, they will just make your "shot sheet" that much longer, but if you have previsualized the character's style, and then FIND it in an inventory, they can save days or weeks of work.
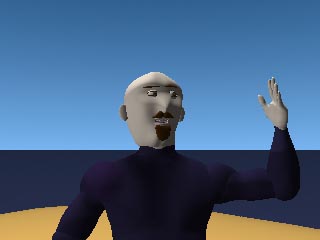
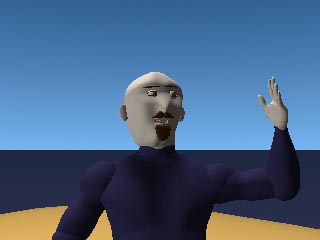
Most models will be "treeform." This model being "free" is probably in large part because it is going to be very difficult to animate with the geometry un-treeform-able. Texturing this model was also agony because it was probably Boolean-unioned or scanned so that there were no other separate object surfaces other than the spear, mount and shield. I used "hide" a lot as I gradually textured each polygon. Of the many benefits of having access to this model: it is one of the first head models I have seen that's not my own; the model may be used as an "extra" "as is;" it was a good thumbnail for testing some concept ideas on, and it gave me some added hope. Not bad for a free download.
If you are going to obtain models this way, you should probaby model a few items to donate to one of the free sites like www.3dgate.com or www.3dcafe.com or www.turbosquid.com . It's a Golden Rule thing. The inventories of sites like www.turbosquid.com are great, but when I needed a flashlight or a coat hanger, it was back to the drawing board. In case you are considering selling models this way; in case you are wondering, you set your own prices, and the site collects half as their royalty. Another way to sell lightwave models is directly like www.lightrom.com which publishes model CD's and advertizes in places like "newtekpro." Most models will be "dxf" or "3ds" formats, though the models created in LIGHTWAVE (several that I have downloaded have been made with INSPIRE) may include a Scene file, object components and some texturing. I have not yet tried textured object translator "PolyTrans" from www.okino.com, though I like the concept.
Incidentally, the "Importing" function of INSPIRE gives some error messages when loading "dxf," "obj" or "3ds" files. Ignore them. Usually a model will not appear to have loaded just because it is too small or too large fpr the window. Press "a" (auto-fit) and your model should be there.
The spear, shield and base turned out to be separate objects, so the only "modeling" done was cutting off the top of the model's head and the bottom section of dress, and point-dragging lassoed sections of clothing. The legs were from a www.cacheforce.com figure object, and the tennis shoes you should recognize from INSPIRE. Most of the work was selecting polygons and giving them texture names, and then fine-tuning the names' textures in Layout. I have been working on a project where I would like to animate a certain style of model -- I don't need to learn how to make it, I just need it. Give me something to morph-from. I suppose that is how some of us get work.
The "tab" metanurb function has some peculiarities, like that buried duplicated polygons or edges that share three polygons will make freaky surfaces. With practice, you gradually stop having fits whenever a MetaNurb looks disastrous after <tab> is hit the first time. The more interesting MetaNurbs like coffee cups and eyelids, will have been "welded" and "smooth shifted" and may have polygons duplicated or hidden or otherwise invalidating the pattern of the MetaNurb's averaging equation logic. You get to a point of seeing a circle hanging in space next to something that looks like a trampoline and thinking immediately, "oops, hidden polygon." Hopefully, some video instruction along with the Manuals will get one up to speed with metanurbs.
Another strange thing that has happened to me, and I am not sure why -- points or single line polygons will be created near difficult geometry areas. These render as lines or particle points and have to be deleted, the sooner the better, since they will ruin morphing if only absent from certain objects. HERE IS HOW TO GET RID OF THEM. Go to Display:Statistics while in Polygon mode. Where it says Polygons with 1 vertex and 2 vertices, the windows should be empty. If they're not, some points or lines have snuck through. Press the "+" beside each window and press "Cut, now resave your corrected object. That's all there is to it.
A number of conventions seem to apply to the aesthetics of realistic modelling and design, such as color balance, repetition of common shapes, and textures that add a tactile or other quality. In figure drawing, artists learn that the more interesting nude has knee shapes repeated in breasts, elbows, rib cage, chin, hair, hand and heel. These artsy tricks are easily cataloged from a variety of sources. Where is the detail in a shot, where the audience is looking or off in the corners of the frame?
The occasional smooth rounded shape among a group of random or wrinkly shapes calls attention to itself. Contrast is also used to make a large dark spaceship appear dark by having a small porthole brightly lit, with a background star somewhere in the frame. This is a cinematography technique. It is used A LOT. Have a tiny character climb an elephant; go from a character wearing a wet rag in a breeze to one in a fur coat; go from trying to see through moving trees to a closeup; follow fear with love, yellow with blue, a long silence with a marching band... IMPACT can be overdone, but it is sometimes one of those "ineffables" that is attributed to the Technicolor corporation, when it is really practical drama and design. I am fond of all kinds of wrinkles because they render fast, and break up the monotony. The computer look is often characterized as smooth and tubelike or boxy; a batch of holes and wrinkles can do wonders.
Another cinematography technique: if you can't fix it, put it in shadows, tilt it away, shoot around it. I was startled to learn how often shadow is used in cinematography. "Targetting" a light on a null and parenting the light and null can keep the look consistent. Other elements like "virtual" barn doors using transparent surface maps and flags and spotlights can keep a problem object from being hit by stray lights. Hollywood likes extra lighting, so images that look heavily lit tend to look acceptable. The quickest fix is to not turn on ray-tracing, but to switch to shadow maps. An "area" light composed of 100 point lights or a single "spinning" light can soften problematic contours, but at a loss of countouring. "Shadow mapping" will create many more artifacts than solutions (light on the inside of a mouth coming from the back of the head, etc.) but it has been known to save a sequence, and it renders very quickly.
The difference between self-teaching and taking an INSPIRE course or video? You may discover the "tab" key about three months earlier (and ctrl r eleven months...). A lot of kinds of animation do not require non-uniform rational b-splines, NURB's, but since they are faster to build with, requiring few points and making the most of those points, consider "tab." It REALLY simplifies things like realistic cartoon mouths for metamorphosed facial gestures using point-dragging. The "tab" NURB's toggle feature is most powerful with fewer points, but it has a distinctive effect which can be noticed in any model, like the sample "Triceratops" that came with INSPIRE. Each model has to be "frozen" using the freeze tool to be rendered in Layout. Another late discovery was the "a" key, to reset the modelling windows, learn that early; the "shortcut" keys are covered in Chapter 14 of the USER'S MANUAL. (I think.)
I am experimenting with adding a little center indicator to objects so that I can rotate them for more efficient point-grabbing, and later re-centering. When you get into painting polygons, this can become invaluable. Another trick for objects with lots of intricate detail painting, is to save each painted section as a separate object. Usually using "Hide Selected"with the "Shift" key while selecting. is the way to pick areas for repainting, but for certain models, this may be worth trying.
One can even plan for bones-rigging a character by placing a small box at every position where a bone will change direction. Bones must be "drawn" in an ortho view, but repositioning them can be done in the Camera view, as long as their wireframes can penetrate solids to give a sense of position. Trying to position bones in ortho views is an exercise in futility, as they give incorrect depth, and changing viewport causes the Bone to stretch from one "zero plane" to another. Not that the Camera view is going to be any bed of roses, because once a bone is rotated, placing it is going to be cock-eyed. To make the boxes: the fastest way may be to use the four layers, copying the object from one layer to another, and then lassoo-selecting all points in Points mode and de-selecting the ones you want to keep. This object will have just enough geometry to see through/work with. It also makes a fair "proxy" for bonesing, though lacking the aesthetic fidelity of "Reduce Polygons." Now open another layer, and make your boxes there, but activate the proxy level as a background by clicking on its flag's bottom half. To view the boxes and model together, open both layers at once, using "shift" when selecting the second layer. In order to adjust the positions of the boxes, you will need to lassoo select them before opening both layers at once. Having multiple layers open at once when you save, all of the layer objects will be saved as one object, which is great when one is switching props, dressing Barbie. When the cubes are in the right positions, select that layer and shift-select the original object's layer, and save the new bones-friendly object. So, in case you wondered, this is some of the fun one can have with those layers.
Non-realistic animation is barely being explored. In some ways, it is the perfect form of animation, because it offends no one and doesn't lead to unhealthy associations for children.
I have just started to look into "photogrammetry." I am inclined to let photogrammetric "scanning" do the dirty work of realistic clothing, props and such, except that the results are looking awful bumpy for the time being."Photogrammetry" can be done using an automated turntable system or using a digital camera and special software. Metacreations' (of Bryce 4D, now Corel) product "Canoma" may not currently be available. A competitor in the UK -- www.geometra-3d.com -- has a free impaired download for VRML and a professional (dxf, obj, max) version in the under $500 range. They are very sweet about licensing it -- download now . A newer program in a higher price range is "REALVIZ" from www.realviz.com . Another local company marketing "dxf" software is www.synthonics.com . Several companies are established in this exciting field with products and services, which is probably an outgrowth of CAD technology, much more than entertainment. Anyone for a technology that cuts their modelling time 90%? I suspect that INSPIRE users can actually "brute" 3D photogrammetry, believe it or not. If one moves the INSPIRE camera far away, and sets a high zoom, and then adjusts a black fog to begin at the near point and hit maximum at the far, this can be used to create a "displacement map" which will reproduce a white-colored object's "geometry." (As long as all objects are white, one can also "brute" a "Z-buffer" image sequence using a point light source with falloff.) A scanner or flash attachment combined with a turntable should be able to do crude homemade photogrammetry in a similar way. The resulting strips might then be "Boolean sewed" resulting in a pretty high polygon artifact.
I make many copies as I go along. For metanurbing, this means frequent back-ups with different file extensions. The benefits seem to outweight any inconvenience. After 22 months of work, I have begun to have 500 megs of objects. May I make one suggestion? Make three models each day for a year, if you are serious about animation. Try to avoid obvious models like the latest jets; make coffee steins and bonsai trees and 1940's flashlights and beauty parlor equipment -- or not. People will tell you your models reflect your thinking. You're on your own. If you make three models a day, you will get better as a modeller, and you may have 1,000 models at the end of a year.
The "chamfer" issue. Create a strip of polygons with feathered transparency and identical texture to the underlying model artifact "seam," and carefully position this "patch" at a compromising angle to hide the seam. This method was recommended by an ALIAS modeller, Steven Stahlberg, but LIGHTWAVE automatically smooths where an object is welded. Still, LIGHTWAVE currently has a "chamfer" command that I believe provides a solution, though I am not sure what exactly for. Presumably, a more all-purpose object could result for better eyelid morphing, perhaps.
The image at the begininng of this Modelling section was a test to see what could be done to remove seams. Again, home study is not school study. Don't go in circles like I did. Ram and blend can be a worthwhile technique if it is followed by patient point-welding. An arm welded to a shoulder, for instance, can still have the end of the shoulder hidden in the arm, and vice versa, with it only barely affecting rendering or animation (a very faint line where the hidden polygons need to be deleted). But the join will appear smooth. Seamless. When one rammed element has fewer or more points, tugging a spare pont to a nearby edge to hide it may be all that's necessary for an acceptable model.
Here's a fun distraction: branding. Why is Max Steele's home base called "N-tek?" Why are there so many cows in visual effects movies and commericals? These don't have to be ther, it's just gratitude.
It appears that for characters with big thighs, one either must metamorphose point-dragged thigh movements and have "bones" for the calves, or "patch" duplicate/saw the character with left "bones" on one model and right "bones" on the other, to have "bones" all the way to the waist. When one uses metamorphosis in this way, however, it is a good idea to put objects inside the object where the bones will be centered, just to remind oneself where one started. A key point to remember about bonesing for metamorphosis is that the model does not affect the bones. Put another way, the bones create a cartesian cloud of numbers when they leave their rest positions -- each point within the cloud assigned a value of "shift" -- no matter what model is present.
This morphing idea is sometimes used instead of, or in addition to, displacement "effectors" parented to a bonesed object like an arm to cause a bicep to bulge during an elbow movement.
Animating and modelling become less blurred with some high-end computer animation systems, but "face shapes" and morphing don't appear to be going away.
I should add here that when I learned about the Stahlberg patch technique, I had not yet grasped some of the fundamentals of smooth shape modelling. A heart shape can be modelled fairly quickly from a box shape, without metanurbs, once one grasps the fundamentals of subdividing the box with just enough points to establish the perimeter of the spherical areas generated, and point-dragging and smooth-subdividing and smothing (high iterations) the result. It seems completely crazy in books, but when everyone in the class is doing it, creating spaceships and toilets and hands and hearts, etc... Otherwise, the only way I might have thought of modelling a heart would have been to mirror a half-heart shape, and then use a Stahlberg patch over the seam.
There are many tools available to modellers in INSPIRE, other than just the obvious buttons. The Layout Objects panel button "Save Transformed" will save the object selected with its vertices and surfaces exactly as they are in the CURRENT FRAME when "Save Transformed" is pressed. If the object has bones causing distortions, or is halfway through a metamorphosis to another pose, or has been displacement-mapped with fractal noise -- this will be the new version of the model. After all, the computer is working with lists of numbers -- that's all. Creating an extreme of a nose and MORPHING and/or bonesing the nose with the original nose, one can create a range of characters using "Save Transformed."
Some animators prefer working on "two's" because the look is better in some ways. If the audience is looking at the elbow joints or the way an arm contorts when a "bone" exceeds its range, either something is wrong story-wise or things could be nudged along motion-wise. I have known animators who didn't pay much attention to anything but hands and faces, because the audience's attention belongs there, and because foreshortening covers a multitude of sins. The only drawbacks of "hinging" smooth surfaces without "bones" are the technique looks a little goofy unless used with a fair amount of motion blur, and spotlighting with "shadow mapping" is required instead of ray tracing, to reduce artifacts. "Surf Blur" surfaced polygons may be useful for some minimally textured joints. If the design allows for hinging, jump on it. (Have a look at the characters in "Toy Story.") A related area is animating with hinging after beginning a Scene in the "treeform" position, for later conversion of the hinge objects using "skelegons" and/or proxies in LIGHTWAVE. It's a cute idea to try as an L-SCRIPT I suppose -- Boolean union all the objects, convert to skelegons, then use them to bones an object on a frame-by-frame "Save Transformed" basis.
The streamlining hinged animators may have the last laugh: one recent trend in animation is to rely heavily on so-called "cloth dynamics," such as those in the "Motion Designer" component of LIGHTWAVE 7. Soft jelly-like tummies swing and sway inside cloth skin bodies, with the realistic stretching and swaying of "dynamics" calculations, applied to keyframed skeletal animations. I haven't done any of this, but it is happening now in plain sight of everyone, so you should be aware of it. Your next model may be a sack with chained or otherwise constrained body masses attached to a skeleton inside.
The jpeg image at the beginning of this section was a test to find out if overlapping artifact seams could be anti-aliased away. A cube had one face subdivided into a thousand polygons, which was magneted to form a round protrusion. (1, 11 and 12 have no spheres.) A small sphere was joined to this protrusion, and an effort made to blend the differences. I learned that the best results were obtained by using the sphere only as a guide either as a "layer" or "inverted" selection, and tugging the cube face to match.
What I didn't realize as a home-study tyro was the effectiveness of WELDING in eliminating these seam artifacts. Had I used the BGConform tool, or just picked a few pairs of points and welded those, even if all of the related points were not welded, the result would probably have been very serviceable. BGConform in the custom tools menu can be used to weld large groups of points, as long as they roughly overlap. First one selects a target group of points, and copies them to another level, then using this as a background by clicking only the bottom diagonal half of that level square, one selects the points that are going to be moved, and then presses "BGConform." Ta-dah! "Press "Merge" to weld the elements securely. "Merge" gets used a lot with copying and pasting and such. Another way to use "BG Conform" for a similar result: make a version with seams, now make a cube with one face subdivided many times, and carefully position "Magnet" using the RMB (Right Mouse Button) to create a sphere shape, and place it at the face. Select the face, but deselect the edge polygons of the face, they need to hold the shape. With the rammed object in a Background layer, place the Magnet at the face and pull it. It may require changing the sphere shape of the magnet and a couple retries. NOW, "BG Conform" the ball to match the seamed version. Cool, huh?

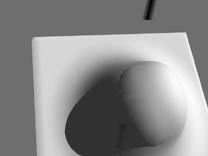
Retouching every frame??? Yes, that used to be the way these things were handled (for the past twenty years). The retouching method I used on the above image pair in less than a minute is what I would suggest (if you don't weld): using Adobe Photo Deluxe Business Edition (very available), in "Advanced," "select" "trace" just the immediate seam area, and "blur" the selection with "preview" activated, adjusting the slide for the best result. With detailed texture maps, this should not be necessary; "tripling" polygons and making minor adjustments in modelling and lighting should be enough. The "clone" feature in "advanced" "tools" I have used for texture retouching. Again, the audience should not be looking for seams. Another common trick is to put two successive frame images on top of one another in Adobe Photo Deluxe by selecting "all" of one image, then touching another and "paste." This technique is used to remove wires in live action special effects work. One simply erases the error in the top pasted frame, and the clean image below appears through. These techniques also appears to be being used for replacement puppet animation by Nick Park, Will Vinton and others.
Two cels taped to the front of the monitor screen, and a grease pencil, are what passed for tracking motion paths years back, but the method can still be used for things like using the same shape of patch when retouching similar frames, or positioning "bones." Physically draw on the cel and don't worry about it. (Avoid drawing on the screen, because the nice monitors are specially coated.) I heartily encourage it for both monitors and scanners that get a lot of use. (Why model a texture that can be scanned, even if it is spaghetti or pizza or the front of a tennis shoe?)
Like Windows XP, everything can be done in a dozen ways. If you spend more than a few minutes on any aspect of a project, get away from it. There will be an answer overnight anyway. : )
Do what you enjoy, bearing in mind that what uplifts others, will uplift you. There is a tendency to get "sucked" into what everyone else is trying -- spaceships, realistic go-go dancers, toy robots, etc.
One great way to learn animation is to see animation. One great advantage of the UCLA Animation Workshop program is the library of astonishing animated films made available to students.
The VCR with step frame controls is a gift of indescribable virtuosity when one seriously uses it to study animation: whether cartoon, cut-out, puppet or CGI. It's all there. When I had an idea for a jogger cycle, I very soon after recalled a Fleischer "Popeye" in which a rotating table-top was used as a background, and soon after had made a toroid canyon using jitter, smoothing, and a texture map. At the UCLA Animation Workshop, one "short cut" recommended for tyro animators was to trace frame-by-frame an entire cartoon. It sounds insane, but another similar "trial" is to talk with pebbles in your mouth for a whole day in order to gain better articulation. To become better able to sketch, make 1,000 drawings. Even ray Bradbury advises writing one short story every week, (because he said it was very hard to write 52 bad short stories.)
(Please DON'T find fault with the way a character mounts a horse or moves their shoulders -- you get back the energy you put out). Is the water clear or blue? Is focus blur used? And if you have trouble with a personal project or assignment, go to the newsgroups and those tapes! Much of the animation from "Max Steele," "Star Trek" and "Babylon 5" used LIGHTWAVE 5.6, which is the heart and guts of INSPIRE.
From the perspective of anatomy, once one learns one animal, one has learned them all. Everything except mold, plants and spiders, according to an anatomy teacher who animator/film critic Charles Solomon had speak at the UCLA Animation Workshop, has the same basic body. Fish have elbows and five fingers, as do birds and whales and lizards and dogs. They may be invisible on a snake, but they're there. And the human tail is a lot shorter than it used to be. Shoulder, elbow, wrist, fingers,... That was music to my ears when I first heard it, so I share it. Animating a bird's wing is animating a pair of human arms -- think flying squirrel with longer fingers and extra feathers. The heel may be in a different place and one of the toes may have shrunk from the basic model, the upper leg may be shorter and the ankle do most of the work, but even a turkey is the same basic model. Animating octopus motions or turtles "cantering" is what animators do. One can use a VCR, or the Eadweard Muybridge books published by Dover Books.
How are some of the more popular forms of animation being accomplished? INSPIRE cannot do some of the things that more powerful packages can, like parenting selected bones from one object to another, and then eliminating the source object. If you feel a faint tinge of frustration, this may be why. It IS possible, but not available. (I believe this may be being done in LIGHTWAVE using Null objects, but I'm not sure.) So, the more productive you need to be, the more you streamline. All your objects have the same direction; Adam Hayes of www.fxacademy.com advises keeping them facing z-positive. If one wants to cut-and-paste skeleton poses in INSPIRE, it might be advisable to create a master skeleton library in one skeleton file, and only animate certain bones that are color-highlighted in the Scene editor. Only the 3 rotation angles will likely be pasted, but each copy/paste edit will need to be done three times. "Morphing" is easier to keyframe edit. Some animators resort to morph poses for characters with lots of "business," especially if seams allow, but if the character also uses "Bones," then the Bones file will need to be copied to the morphing hands/eyes/mouth or it will float in and out of the character. A separate Scene file and the "Load from Scene" button and "Replace Object" button are all that's needed to copy a body skeleton to a pair of morphing eyes, etc. The two bones skeletons overlap one another completely, but for different object files -- one would be the animal skin, while another would be the animal gums and teeth, tongue, eyes and tail, with extra bones.
This technique works much the same for morph poses, where the tongue and teeth, etc., are loaded in the same order as their morph partners, and the morph envelope is saved from one object's MTSE graph envelope and loaded to the other.
On the subject of eyes, eyes that use bones may be easier to texture; since INSPIRE does not have UV mapping, the morphed eyes will need a solid color or an animated texture. A drawback of this hypothesis is that the eyes may need a very high strength of 6000% or so, with the length/16^ falloff setting, to prevent the neck and head bones from deforming them. For control of fine details like eyes, I sometimes place many small bones along surface areas, parented to a single small bone, which is colored differently in the Scene Editor. But this technique is not advised, because it leads to immense bone casseroles which are unnecessary and can slow down the refresh time of Layout.
If the animal allows it, I have recently been bones-rigging mouth and facial gestures but morphing eye positions, since this gives me more freedom for improvising "business." More about bones rigging for INSPIRE below.
Let me state this for the record: frustration sucks. I want a program that allows me to morph and Bones together naturally, that allows me to cut-and-paste key poses, to load blocks of animation data like arm animation to the relevant Bones without a lot of typing, and to mirror animation from one side of the body to the other. Copyright issues may be why INSPIRE lacks these facilities; I do not know. INSPIRE seems to be very close to this already. How about if preparing to copy/paste a parent Bone, opened a window prompt asking "Do you also want to copy the child Bones' motion file info for these frames?" From what I'm told, I've just described LIGHTWAVE 7, more or less.
Did you know a bones skeleton can walk into frame and leave it, and the whole time the actual object can be either off screen or in the middle of the frame or anywhere?
The experts apparently use very low polygon "proxies" for Bones and other animation.
To be perfectly honest, "Max Steele" used a lot of "motion capture," with a fair share of keyframing. Keyframing is great for fast-paced exaggerated animation choreography, but if you have a slow-moving character, motion capture is going to look real and probably be more efficient to load. Again, INSPIRE gives one a taste of what is available, but if one is doing motion capture, one is probably also using full versions of LIGHTWAVE, etc.
I learned by accident that the Scene Editor has the most powerful influence on screen refresh times, which are crucial to animating. Load a complete Scene, one with a bunch of objects. Now open the Scene editor, and go to the second column from the left and click on the boxes multiple times. it's a real frustration reliever to get your screen refreshing down from 20 seconds to two, even if half of your object becomes either wireframes or partial solids. One big advantage of mixing solids and wireframes is going to be that it will highlight the number one bugaboo of CG animation -- stuff going through other stuff.
Contrast works as well with animation as it does with modelling. Have a tiny character climb an elephant; go from a character wearing a wet rag in a breeze to one in a fur coat; go from trying to see through moving trees to a closeup; follow fear with love, yellow with blue, a long silence with a marching band... IMPACT can be overdone, but it is sometimes one of those "ineffables" that is attributed to the Technicolor corporation, when it is really practical drama and design. Have a character stand or walk slowly and then "limber" with every-other-frame staccato hand and arm motions, then gliding out and stepping back. One other point: all of these ineffables should be written toward/through: a long period of silence may be typical of character self-indulgence and isolation, for instance. Colorful surroundings may reflect exuberance and vitality.
INSPIRE USERS: in case it hasn't already occured to you (it's in the book), the "Light View" display option can be used to check animation fine points if one doesn't want to adjust any camera settings. (One should also create back-up Scene files and saved "mot" camera files when one gets what they are looking for.) One can have extra lights with zero intensity settings double as extra cameras, if one really really really doesn't want to save the camera path as a motion file or separate scene and get back to it later. Make the extra light current by selecting it from the Lights menu or using a mouse click, and then click on the "Light View" button. Reset the new light to have a zero intensity. You may want to go into the Scene Editor panel by clicking on Scene Editor, and change the color of these lights' icons by clicking on the dot to the left of them in the first column on the left. I put one light close to the head of each character, parented to it. Problem pose areas can be quickly tracked this way. If you find a camera angle you really like, position a dummy object near the light and parent the camera to it. Are you using the "Alt" key to adjust the top front and side views? Are you using the Options window to adjust the view size? This camera technique is also much more powerful if one uses Nulls to parent the lights to, and then switches to parenting the camera to the Nulls for precise position accuracy.
Recording "tiff"s or "tga"s instead of a Newtek "avi," and then converting them to an "avi" by using another Scene file as an "avi"-maker using the "Load Sequence" button, or using "Bink" from www.smacker.com allows one to abort the rendering at any time or pick up the pieces if something is amiss. (Do not use "jpeg" format, since it degrades the image quality during compression.) "Bink" is also handy for viewing your "avi's" in realtime in case your PIII isn't nitro-fueled for DVD. There is nothing like watching an animation loop in real time for making a fix-list. Then one can discard the 300 meg "avi," but keep the 20 meg "Bink" file for inspiration. I was under the impression Tiff's were more widely importable than "Tga's," but I'm told the "tga" is a more compressed file.
Metamorphosis (Reference 3.8) creates smooth inbetweens for each extreme and looks fabulous. Gestures and actions become very liquid and natural. I am not downplaying the ease and power of "bones," which I picked up even later than "tab"/NURBs; but how does one bones-animate facial gestures or lip synch? (Remember to use the tongue and teeth in every face model to keep the points total equal for metamorphing.) My only confusion about this feature is that it requires loading all of the objects that are going to metamorphose into the scene before doing the very easy keyframe entering at the envelope window, and one needs to then hide these obects apparenty, unless I am reading the directions wrong. The easiest solution seems to be to parent all the objects other than the start MTSE object to a single polygon object scaled to 0.00 and/or moved out of frame. Metamorphosis yields a very classy look.
While on those two subjects: metamorphosis and the learning curve less-taken -- consider "HIDE UNSELECTED" in the Display menu of the Modeller. Wow! Metamorphosis suddenly became do-able when I could make the parts of the model disappear that were obstructing a clear view of the wireframe. "HIDE" is used often in many modelling programs, so learn to use it well when assembling complicated objects. And use "Shift" select.
Sometimes the Modeller plug-in BGConfrom will provide a morph fix, "Smooth" can also help correct odd geometry.
I have heard that facial animation is best when it combines metamorphic mouth face-poses with bones for added definition around the eyes and to save making hundreds of object permutations. There are tutorials online at sites like www.flay.com and www.3dsite.com and www.3dcafe.com that address facial "rigging." MetaNurbs really pay for themselves when tugging and squeezing to make good gestures and mouth detail. One can make a couple dozen heads relatively quickly and then weed-out the clinkers. Others may be weeded out by the morphing program if they artifact from coplanarity, etc. (BGConform may be able to fix some morphs. Sometimes smoothing helps.) The solution I generally resort to for coplanarity (polygon casserole) is to saw apart the object or Boolean a master object and re-morph. The head with the separate eye objects will need to have the eyes parented and then any Bones copied to the eyes, and then the animation of the Bones added just before rendering, which is probably why "Max Steele" and others don't do teeth this way. If the neck cranes using Bones, then the eyes will seem to drift from their sockets, and the only solution I know of is to "Save Transform" the eyes, Bones them, and copy the head/neck Bones skeleton to the eyes so that they follow along. This is accomplished using "Load from Scene" and then "Replace Object," both in the Objects panel.
"Animation" has three broad meanings: in CGI, it applies to plugging certain object files into certain motion capture or heirarchy motion files in relation to other files, frequently using puppetry conventions; it's somewhat based on interpolating and adjusting motion frames for key poses based on a model sheet, which is conventional animation; but it also implies all of the tricks of staging, color choice, acting, rhythm, music, etc. that are broadly umbrella'd under dramaturgy. The most powerful dramaturgical tip I feel is letting the Golden Rule do the talking. In Shakespeare, characters swear oaths like mad in the first act, oblivious to the Golden Rule's rule of consequences.
In some studios, apparently the model is created by one team, "rigged" by another team, textured by a third and actually "animated" by a fourth. Why not? Special effects "animators" often work strictly with "particles" systems that do not use polygonal objects.
So, what is animation? A lot of it is cultivating "overlap" the visual overlapping of objects elements so that the movement appears "smooth." Smoothness" can also be damaged by an abrupt "stop," instead of overshooting and anticipating every start or stop. That's the animator's way. Splining helps, but sometimes the work is achieved faster by going to the frame before the stop keyframe and copying its position to a frame five or ten frames before. Easing into a keyframe or out of a keyframe is similarly achieved by copying the frame two frames before that frame to ten frames before it, and deleting the original. I love "auto-key." Some call it "auto-scene destruct," because one needs to make many backups as one goes along for the technique to enhance productivity, or keyframe "trouve's" may be lost. Scene files take even less space than object files, so there is litte excuse not to protect the work by numbering the scenes, starting with name01.lws.
Unique to CGI/puppet animation is the need to have x/y/z rotation pretty much at all times. Puppet animation is less likely to have joints that appear to be hinged or on dowels because it knows its roots. Although I was elated to discover my textures and lighting were so realistic, when my animated racer looked like he was shot on a tabletop, I realized I had forgotten to "jitter" some x/y/z rotation. So, overlap silhouette positions from one frame to the next; have whiplash overshooting; have motion in every axis; when keyframes reverse a motion and it jerks, either add and/or move keyframes; where natural motion like hand gestures are on one's, go to one's; have a torso stand perfectly still only after it's been zapped with a freeze ray; before you worry about gravity put some attention into the character's emotional expression.
Having jittery motion also applies to camera work. The best camerawork tries to emulate the way our sight anticipates where someone is going, and then we sometimes lag behind when they actually move. Splining often helps, except for the scene-start rubber-banding that is best removed by making the first one or two keyframes "linear."
Gravity is fun, but the last thing to add when assembling poses for animation. One thing I like about using conventional hinged animation objects instead of "bones" is how that one can go directly to the pose without sweating creasing or some weird artifacts. Hoo-hah! I probably animated more in the first few weeks of owning the program than in the last few months. I have heard that "skelegons" may be comparable. Do what works! IN FACT, if you have characters that could be modified to wear clothing, despite the fact that INSPIRE does not have that function yet, I would heartily encourage all INSPIRE animators to use old-fashioned hinged armature animation, and then network or "move-up" to LIGHTWAVE 7 to add cloth when the animation "is in the can." Armature animation is intuitive, direct, and uncomplicated.
Animators animate by not getting stuck in details. Too many objects to make for a background? Use photographs for backgrounds wherever you can; front project! "Photo-shop"/paste-up backgrounds to get something you need. Recycle everything! If "bones" don't give the right look, switch to hinging and sacrifice ray tracing for shadow mapping with spotlights. Create your own "bounding boxes" out of rough shapes in the modeller if that will help speed the process of choreographing a scene (or use the polygon reducing plug-in to create a "proxy"). An even BETTER solution for when refresh rates get slowed by high polygon objects is to HIDE EVERYTHING in the Scene Editor panel, and then only highlight the objects you select by toggling the texturing icons in the texture icon column beside the element names. (The column that does NOT change their wireframe color.)
Get in trouble parenting the wrong object? Create a null out of that object by renaming a one polygon object file with its name ( AFTER you save it with a different name!) and move along.
As for "Bones": I suffered for a very long time not understanding that I needed to use the keystroke "r" after positioning bones. Also crucial for correction: "Ctrl r." These two commands do two very different things. See "101." It would seem to be ideal for things like mechanical elements and biological elements that don't have overlapping leaves/limbs in the same object file. It looks like it is being used for everything from fingers to faces, trees to hairs, skirts to bubbles, with the obvious advantage that only a few textures are used per character, and UV mapping is not necessary. I got pretty bruised going in circles on this one though.
The first thing one needs to know about INSPIRE's bones, is that they work. The Manual did not handle them very well perhaps. But they DO work. When they are used, they have two annoyances: first, one cannot do what one WANTS to do with them, like parent an effector or Null to a bone, and second, because they are loaded into the zero axis plane of the ortho views, if one switches views to go from drawing arms to drawing fingers, the first bone drawn in the different view will look insane and need correction, making correction necessary for everything but snakes, spiders and puddles.
Now you know, they work.
Two essential things to know about Bones: there is a way to cover any region of points with a force field that will allow turning/stretching only them; and there is a way to have the force field "fall-off" for effects like a neck twisting. Although there are at least three ways of having the force field affect areas selectively, not including ways not included in INSPIRE, I think I prefer the way listed in the Manual, even though the terms "Minimum Range" and "Maximum Range" recall the light intensity or fog inputs, and it isn't like them. A same-value "Minimum range" and Maximum range" bone cloud is one solid value clear through. I like to make the bone as small as possible, when I want sphere-shaped clouds, instead of hot dogs. Think of it like taking that area of the object and pouring resin over it, like a clear plastic paperweight. In some ways, this is ideal for the novice. It does have one other peculiarity about it, though, because since it uses the position of the bone as the center of the region, one will have to use a parent bone to pivot with! The technique the book recommends is laying down many small bones, and adjusting each's limited region to closely follow the skin of the character, and this sounds reasonable.
This also explains something I had been wondering about -- the presence of tiny bones between large ones in several models. The tiny bones are doing the pivotting, since the pivot point is trapped in the center of the bone cloud otherwise. Ideally, with a system like this, one will stick with one size and strength of bone, saving variation for areas like the neck where some falloff is required.
None of the bones will work until "r" has been pressed for each bone. Some adjustments in position are usually necessary since the "Draw Bone" method only draws in the zero plane. Pressing "r" sets the balloon to attach to the points in its region. Again, the pivot point bone will probably be different from the balloon bone. If the bone is inactive (ctrl-r toggle), it will not appear to influence its points of the object, though other child or parent bones that are active may appear to affect its area IF their limited regions allow it.
Either way, one can plan for bones-rigging a character by placing a small box at every position where a bone will change direction. Bones must be "drawn" in an ortho view, but repositioning them can be done in the Camera view, as long as their wireframes can penetrate solids to give a sense of position. Trying to position bones in ortho views is an exercise in futility, as they give incorrect depth, and changing viewport causes the Bone to stretch from one "zero plane" to another. Not that the Camera view is going to be any bed of roses, because once a bone is rotated, adjusting it is going to be cock-eyed. Position the bone responsible for pivotting's pivot point directly over the box. One can leave the boxes in the character, changing their texture to transparent, or replace the characer object with one without pivot boxes.
The other leading method uses rest length to determine the crcumference of the point cloud, but according to www.retinajoy.com , the length/16^ falloff may not be dramatic enough unless the typical two meter object is originally made 200 meters before rigging. I've noticed similar effects, that length/16^ isn't enough falloff, but experienced riggers do not seem to have a problem with this, possibly because of the control provided by neighboring bones. With this method, one will probably pick a strength of bone like 100% and stick with it, letting the three variables of bones position, bones length and other nearby bones provide all the complication one needs out of this corner of the world. The one control of bones that provides the quickest fix is increasing bones strength however.
There are many subtleties to bones rigging and I've only encountered a handful: giving a shulder to a cat object that has none, where the pivot point is keyframed to move and is displaced; bones in ropes, tree branches, turning book pages, tails, and such; bonesing effects like cards for fire or vents of steam; bones rigging subdivided cards for morphing, twisting or other effects. (Bones would be less likely to be used for "rippling" than an animated 2D texture displacement mapped to a subdivided card with a 100% reflectivity, but bones would more likely do effects like twisting an image sequence to a ball.) Something tells me there are dozens...
(I wonder if LIGHTWAVE has an "ocean of bones" feature where a character's bones rig can be displayed as a relief displacing a subdivided card. I think this would be cool...)
"Inspire" does not have LIGHTWAVE "collision detection," though the two "Effector" tools probably come fairly close to it. Collision detection can be used for everything from swarms of bats to silk dresses. Motion effectors can be used to animate the flock through tree branches which repel them while they metamorph flapping, parented to offset parented Nulls. Displacement effectors can be used instead of scaling to "squash" a bouncing ball, where effectors are located at the surface of the ground, and one is located inside the ball. (Or the ball can have one or more bones.) Brute-forcing some of these effects gets a little crazy, but being able to do a group or animals or cloud puffs can probably be rewarding. Most recently, I "bruted" a chair being nudged by a race car. It looked completely real, and all I did was adjust the chair's position when I saw the tire go through the chair.
Computer animation spoils those of us who could not imagine picking up a shot at the moment it left off, days or weeks later, or going from a character in a repeating cycle to the same position and ending the cycle. This can also be achieved by having a cloned version of the main character object-dissolve with copied-and-pasted keyframes, but it is probably not necessary.
Animation post-production does exist, though I have only heard this as a rumor. (According to the camera department, it all happens in the camera.) Using object-dissolve extensively allows for "switcher" effects like multi-image pans, perspective effects and other little touches. INSPIRE's Compositing tools which all revolve around the Image Panel's "Load Sequence" button" for foreground, background, front projection and alpha matting can produce a great many effects from dissolves to titles to "opticals" and beyond.
The book recommends using the shortcut key "F9," which renders the frame you are viewing PDQ. Useful enough to mention.
I like the idea of "motion capture." There, I said it. Although it is seldom used for feature animation, it's available as a plug-in for "Lightwave," and may be built-into Maya and others. "3D Studio Max" has a well-respected plug-in called "Character Studio" that can integrate motion capture files with a marionette which is animated using mouse-positioned footstep icons. I have heard that "Merlin 3D" from www.merlin3d.com may be packaged with a "cyberpuck" called "Nav3D" that has xyz rotation and movement for real time motion capture of one object element at a time. At past SIGGRAPH and www.3dshow.com conventions, some wonderful motion capture devices have been unveiled. Game Developer groups may also have good information on the latest in motion capture. I haven't researched "Mo cap" very thoroughly, but when I last looked, the following link page http://www.art-magic.be/mocalink.htm showed a couple dozen resources. When one doesn't use "motion capture," one either uses animation skill or "rotoscoping." Rotoscoping used to mean somebody putting on a costume and being photographed and then the images traced, but generically means using camera images to study from, also called "bruting." One can "rotoscope" documentaries bought from the video store or borrowed from the library, as well as recorded with a camcorder. Dinosaur movements based on ostriches. An Intel "videophone" camera has an excellent reputation, due to a VHS jack on the back of the camera for capturing video. Some video cards include VHS input and output. Using the "Load Sequence" button, one may rotoscope from "avi" footage converted to "tif" or "jpg"s created in "Bink" or "Vidget."
If I were to set up a "mo-cap" stage, I suppose I would do it in an open field or parking lot, with a grid on the ground and two walls, and using the longest lens at the furthest distance possible, perhaps with a huge mirror hanging over the stage at a 45 degree angle. That should give me something to "roto" from, without a lot of grief. Some "vinyl mirrors" used in stage craft are pretty sharp. Otherwise, one would need to match lens angle and position to position and size of character probably. "Pixel-tracking" is automating "mo-cap" dramatically, using programs like www.newtek.com "Aura" to generate "mot" x/y animation files. For the trouble, I hope one would move up to XSI or LIGHTWAVE, or share one's evolving script with some folks able to support it.
There is SO much that can be done with a tool like "INSPIRE3D" without any extra tools! Have a look at some of the other web site links on the web rings. If one wants to speak the silent movie language of cartoons, one can refer to the Preston Blair animation book with its catalog of melodramatic poses. It is stunning how quickly moving through an inventory of poses for a scene PRESTO becomes an animation. I have done long sequences with as few as three joints and NO replacement. One can learn a lot from dashboard hula girl ornaments and aquarium art. One can get a lot of emotion out of waving arms.
The charm of "inverse kinematics" or "IK" is that one can mount/parent/child a pair of feet to an invisible unicycle, and have the attached calves and upper legs follow. There are variables -- ever more variables -- to set, but the effect is nice. When combined with motion capture technology, I have heard that this is a very productive approach. This is not an "Inspire" feature, though I have tried to brute it. I believe I have also read on the newsgroups that "Inspire" can use real-time motion capture like the "cyber-puck," though it would behoove one to animate from parent to child only, lest a foot or hand be left in mid-air. The "unicycle" approach can also be bruted, by having shoes parented to an offset rotating null, for instance, and compensating for the rotation, and then positioning the knees to match. Realistic decelerating bouncing effects can be achieved by having two or three nulls, with one changing in size, moving and rotating at the same time. To brute tweak requires moving the camera back and forth in layout, but only a dozen keyframes are needed to create a ten second cycle using the graph editor. "Forward kinematics" is actually used in "inverse" kinematics fairly often, but IK has its uses.
That is worth repeating for emphasis. Usually, although IK "handles" may be set up for a limb, the animation is still from shoulder down to wrist, the same as FK. One great way to learn not to move the hand before the elbow is to have the hand suddenly float in mid-air, but I won't go so far as to prefer FK over IK.
There is a virtual reality standard that includes conventions for solid modelling graphics and javascript called VRML 2; its specifications are available from www.vrml.org . There is also a web ring, and newsgroups on usenet and various boards like www.askme.com . These standards make it possible to download animation as motion and object files instead of as graphics over the world wide web by the use of a web browser plug-in, somewhat similar to the Shockwave viewer for Flash animations. This browser is fairly common to get but not yet too popular. What online gameplayers (using 56K modems) have known for years is that once one downloads the character models, the motion files are small enough to be real time. INSPIRE (VRML 2) could be an alternative to Flash, and I have seen some experiments in this direction. Once one loads "Mickey Model," each animated short requires only a set (the gym/trampoline, the car repair shop, the airplane, the radio station), the motion files and audio. The bizarre thing is that two things are added FREE: being able to click on characters as links, and being able to move around in the scene or view it in 3D. Thus, every online "cartoon" has more in common with a hologram. Plus, links can take the form of "mouseover" game effects like having a character flail a butterfly net whenever the mouse cursor touches them.
INSPIRE's Layout Plug-In button's "VRML SceneSave" opens a panel with options for triggering sound and other URL's by clicking on or revealing an object. I haven't put this feature through its paces, but it is nice to know it's there. Again, there is a lot to INSPIRE. An alternative is to load objects into "Pulse Creator" from www.pulse3d.com using INSPIRE's modeller exporter translator. "Pulse Creator"incorporates a proprietary VRML-like player and features inverse kinematics. The premiere tutorial site -- www.3dcafe.com -- also has a section of VRML tutorials.
Two of the three contributors to this universal VR standard were Sun, which suggested having java integrated in VRML 2, and Sony. I share this because if you are interested either in writing games or in creating virtual libraries or amusement parks like Inspire Joy Land, with a shooting gallery (blowing kisses when someone frowns), etc.: although I am not a gamer, I have learned that this is possible with INSPIRE. I do not know if VRML is truly a "gaming" standard, though one imagines being able to force-fit it to some gaming duties. I am not familiar with "gaming" motion control conventions like www.nemo.com for 3D Studio Max, but there apparently are third party developers using modelling and animations from MAX and LIGHTWAVE at least. According to www.newtek.com , the next upgrade of LIGHTWAVE will be more game-developer friendly.
To get an old-style jittery clay animation look, the Object Lister saves on memory, is very fast, and saves object renaming work in the Modeller. I thought I would rarely use it because of the quality and ease of deformations metamorphosis and unsplined dissolve using the Scene Graph panel. But, having a character with a cycled Boolean-altered body with unequal points has been just one of the many great uses for "Object List." Using "Save Transformed" to extract metamorphic in-betweens and tweak and re-texture them is further "insured" by having "Object List" in one's back pocket. MS Notepad includes copy and paste functions, so, as long as one types the object files names as they read and types exactly what the book shows (Reference 13.9 "#LW..."), it should be copacetic and very quick. The file can be named anything one likes, but it should be a ".txt" file. Used along with "bones," and blur, it can be a useful tool.
Lastly, on animating lip synch, if push comes to shove, use any realistic sequence of mouth animation and "fake it" by performing the character's part into a camcorder or other recorder while viewing the "Bink" file. By this, I mean if having a few "w" mouths, a couple of "a" mouths, a "b" and "th" with a gap between of 15 frames gives a talking appearance you like, do that. It is remarkable how we can pick and choose syllables to fit animated talking while viewing the animation, and the resulting track should be useable. I recall doing a test with every mouth movement I had; the result happened to look like "Thanks, thank you for your help." And so it was.
Programs like Steinberg "WaveLab 2.0 Lite" allow thorough sound transcription for perfect lip synch, because it has a facility for expanding the soundtrack for better transcription that is very useful. It was a free product, included with "Mixman Studio Pro," which was one of the first programs I bought, though I use it more than Mixman. Transcribing can take about an hour a minute, and it's a very rewarding hour if the performance is on track. (If one has a sock puppet character, the only care that needs to be taken is being careful to mark "s" and "z" sounds as closed mouths.) "Bink" allows running the video at half or even tenth speed with the sound slowed down, in order to double-check the dialogue for last minute lip synch fixes. Windows also includes a 100% sound-slowing effect in its Recorder program, though analyzing sound in this way leads to either hundreds of calculations or the use of tables to convert the results from time intervals to frames. The "Scene Editor" can convert half the controls to seconds, instead of frames, but metamorphic animation will still rely on frames.
Mixman has an excellent filtering program, and lends a sparkle to recording that I am very grateful for. "Bink" allows adding sound to "avi's," and compresses it very effectively at the same time. It's fun to do low resolution tests with lip synch early; the shots become a big morale boost, and you will know that that part of the production is "in the can." Since lip synch files are metamorphoses, they can be "loaded" from one scene to another using the "Load from Scene" command in the Objects panel. If they have animation keyframes, these need to be removed (done quickly by loading a new object's empty motion file over the existing file) before parenting the objects to their twin siblings in the Scene.
Need a rough soundtrack right away but don't want it to sound like you are the only actor? Talk to Pinky. Sticking a finger in one's mouth is very effective in getting vocal distinction on the fly. If one has access to a "cyber-puck" and can get in the "groove," performing while laying down sock-puppet vowels animation should be possible. The better look is obviously fully articulated Nick Parkesque mouth poses.
Good diction can be learned by talking with pebbles in one's mouth for a day or so, I am told. Articulated syllables sound better afterwards.
Inescapable. Someone will be talking about working on understanding Adobe "layers," and you will suddenly realize they are talking about higher purer "layers," eternal ideas.
During my second year of undergraduate study, my productivity nose-dived. I think I lost touch with my sense of possibilities. Do you want to awaken vestigial telepathic mechanisms in others? Do that! If you want to do more, share that! Experience has shown me that trying to keep private about ideas and inventions has stymied and stagnated me; what frees the juices is thinking outside the box of greed, alias hypothetical materialism. When we try to help others achieve, this is when we too achieve.
The way to maximize productivity in school is the same way to maximize it at work; focus on expressing your potential, or your reflection as an heir of an higher power if that's where you're at -- do not focus on how good you are, or how bad others are, dawdling over past successes or on work far in the future. If school becomes competing for grades, looking down on your peers and fantasizing -- get out of there, you will not get anything done! Or turn your productivity around. Working at home, alone, one can make a one minute short every week, and have twenty shorts at the end of as many weeks; if school is offering one significantly less, buy the program, and get your social interaction by using the school's pool and offering to help the students you meet, and maybe going to the occasional rave.
As artists, we waste our time when we dawdle over comparisons of one tool versus another. The strongest tool in modelling is probably "MAYA" from www.aliaswavefront.com , and it belongs to the group of leased high-end softwares that appear to only be available to the outwardly successful or in a school setting that filters out the less-talented. I do not wish the latter on anybody, since faltering with the software will leave one without both a "reel" and skills set after weeks or months. Perhaps I am too easy-to-bruise on this point; this has been www.aliaswavefront.com 's policy for over ten years. The introduction of MAYA PLE would appear to signal a pretty major shift however, though it will remain a high-end leased software. Having a program feels a lot better than studying something that is going to be taken away from you unless you commit more time, and then may be rationed depending on render demands. But I also tell myself I can walk away from animation at the drop of a hat if the Lord says so.
So, help others maximize their productivity by letting them in on the power of the Golden Rule. It isn't the only thing Jesus taught, but it's pretty magical. If you want others to teach you, try to teach those who need it. (Tell them about this web site if you like it!) Pass along tips, help others catalog color schemes or amass inventories of scenes. I think the most productive I've been has followed being completely focussed on expressing goodness without judging and starting the day with the weekly Bible lesson. What goes around comes around, and delightfully, in the kinds of ways that point us to very powerful religious experiences.
I'll let you know when I find some. So far, the one solid-modelling related work I have done was at a CAD/CAM manufacturing company. The people were very kind, and the work was essentially producing instruction manuals for circuit boards in submarines. When I recently listed with an Internet job board, I received a number of openings for CAD and CAD/CAM support. As solid modelling experts, we are able to produce and manipulate designs for instruction manuals, web sites, presentations and advertizing.
On this website, I basically walk through the instruction manual, and when I come to a subject area where you're damned if you do..., like competing programs, I make note of the Christian perspective and move on. Employment is one of these areas, so I am keeping this short. The mortal view is going to say: a) if you don't learn the most expensive program, you're toast [and the leading program is never enough; there are upgrades, UNIX scripts, peripherals, comprehensive knowledge and specialization]; b) if you get turned down by a leading studio, you're toast; c) if the economy goes soft, you're toast. I wish more Christians knew what the "economy" was: it's lovingkindness, diligence, pointfulness and communication effort.
It helps to know how money is made for a company, so that you can make money for them more confidently. See the Business section.
And please remember: it is very abnormal for animators to be treated poorly, since mastering these skills requires more facility, sensitivity and knowledge than a majority of other fields. If you encounter someone who is treating animators poorly, you may want to remind them of this and pray for them to grow in understanding, and move on to someone who isn't a pill; some like Albert Pike advise fleeing situations where you are being insincere.
I strongly believe that good deeds and intention are as powerful as mailing out a hundred VHS tapes with a resume. The resume gets put into a file cabinet generally, and when work appears, the resume may be passed around a committee table. I was once hired from a relatively small cold mailing. I have been told that as long as you get into the file cabinet, you're okay. I have also been told that when a worker is needed to fill an opening, the first people asked for resumes will be the workers at the company -- who do they know?
Others I know have prayed all day every day for a time and then have found work. Invite others to pray for you.
If a team needed animators, what would they be looking for? Is that person you?
In order to learn who is making what, check the credits of the shows or movies first. At the end of one ROUGHNECKS: STARSHIP TROOPERS episode was the logo for Foundation Imaging, which has a long reputation in special effects. Many leading studio's and job boards are listed here on the Links page.
The "portfolio" has seemed instrumental for some friends of mine who have gotten work. In fairness, more of my friends have seemed to have gotten work by aggressively networking with co-workers and fellow students. One animator took a very menial job, then produced a "demo reel" on the spot by drawing one of the "tests" at one time required to become a union animator in his lunch hour: a high quality "skip cycle" foreshortened view.
A good friend of mine has let volunteering for industry organizations help her keep open a dialogue with the movers, shakers and buyers of her artwork. The leading groups in computer graphics appear to be SIGGRAPH at www.siggraph.org , the newsgroups, animation festivals, webrings and mailing lists. She also advised going to User Groups like the Los Angeles Lightwave Toaster Flyer User Group at www.iqdigital.com/lalightwave/ .
I hope that we all want one another to make a good living and succeed. It can be surprising how often we are given the opportunity to get one another work, money, inspiration, hope, security, exaltation, healing.
I will stop there, because there is a pretty big disconnect between trying to get a job animating raindrop impact algorithms for a big studio and making an updated "Davey & Goliath" on your own dime.
Finally, there may come a time, hopefully soon, when you transcend this field which wanders so far into the no man's land of the second commandment. The animator is gifted with insights and abilities that suggest an even greater depth and acuteness than their peers may nurture. Flee from man whose breath is in his nostrils. Consider applying your gifts to greater good than this mere mirage.
www.inspirejoy.50megs.com